How to Set Up a Home Mesh Wi-Fi System for Seamless Coverage
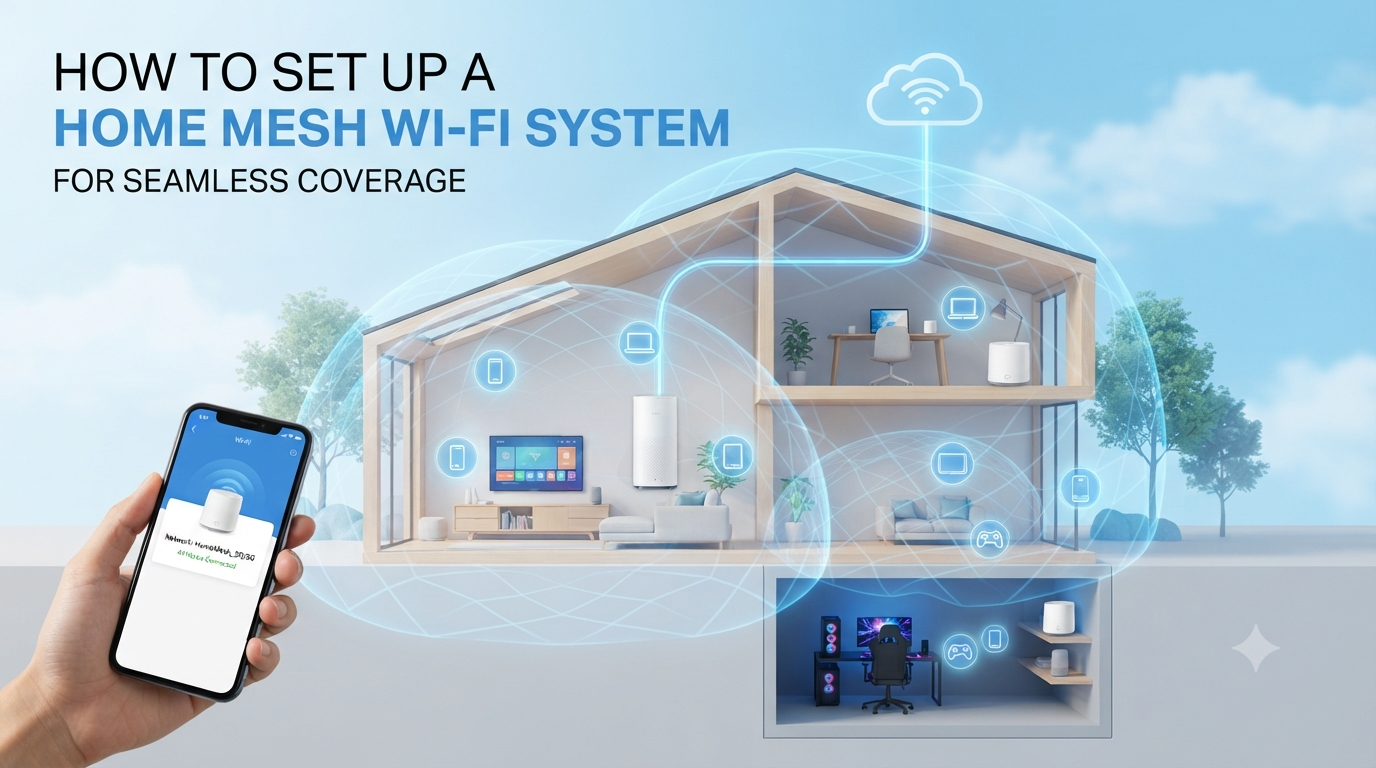
Setting up a mesh WiFi system involves connecting a primary router and strategically placing satellite nodes to create a unified, high-performance wireless network that eliminates dead zones and provides seamless whole-home coverage. This guide details every step, from choosing your system to optimizing its performance.
Are you constantly battling frustrating WiFi dead zones, buffering videos, or dropped connections in certain rooms of your home? It’s a common modern-day dilemma, but there’s an elegant, powerful solution: a home mesh Wi-Fi system. Unlike traditional routers or simple extenders, mesh WiFi delivers seamless, robust whole-home coverage, ensuring every corner of your living space enjoys fast, reliable internet. This comprehensive guide will walk you through exactly how to set up mesh WiFi, transforming your home network from a source of frustration into a beacon of connectivity.
Understanding Mesh WiFi: What It Is and Why You Need It
Mesh WiFi represents a significant leap forward in home networking technology, designed specifically to address the limitations of traditional single-router setups. Imagine a network that blankets your entire home in strong, consistent internet access, eliminating those irritating areas where your signal mysteriously vanishes. That’s the promise of a mesh network setup, and it’s a game-changer for modern households with numerous connected devices.
Traditional WiFi vs. Mesh: The Key Differences
To truly appreciate mesh WiFi, it helps to understand what it’s improving upon. A traditional WiFi setup typically consists of a single router that broadcasts a signal from a central location. As you move further away, or as walls and floors interfere, the signal weakens significantly, leading to WiFi dead zones. Attempts to fix this often involve a WiFi extender vs mesh system, with extenders simply rebroadcasting a weaker signal, often creating a separate network name and causing handoff issues.
In contrast, a mesh system uses multiple devices—a main router (primary node) and several satellite nodes—that work together as a single, unified network. These nodes communicate with each other, often using a dedicated wireless backhaul, to create a sprawling, intelligent network that covers a much larger area with consistent signal strength. Your devices automatically connect to the strongest available node as you move around, ensuring a truly seamless experience without manual switching or drops.
Benefits of Mesh WiFi: Saying Goodbye to Dead Zones
The advantages of a mesh system are clear, especially for larger homes or those with complex layouts. The most prominent benefit is undoubtedly the elimination of WiFi dead zones. No more struggling to get a signal in the bedroom, basement, or backyard patio. Beyond coverage, mesh systems offer enhanced performance and convenience.
Key benefits include:
- Whole-Home Coverage: A single, strong, and consistent WiFi signal everywhere you need it.
- Seamless Roaming: Your devices automatically switch between nodes without interruption, like a cellular network.
- Simplified Management: Most systems are controlled via a user-friendly smartphone app.
- Improved Speed & Reliability: Often utilizing advanced technologies like tri-band mesh for dedicated communication between nodes.
- Scalability: Easily add more satellite nodes if you expand your home or need more coverage.
When is Mesh WiFi the Best Solution for You?
Mesh WiFi is ideal for a wide range of users and living situations. If you reside in a multi-story house, a home with a large footprint, or a dwelling with thick walls and other architectural impediments that block traditional WiFi signals, a mesh system is likely your best bet. It’s also perfect for smart homes packed with numerous connected devices, from smart speakers and security cameras to streaming devices and smart appliances, all demanding consistent internet speed.
If your current router struggles to deliver reliable internet to every corner, or if you’re tired of manually restarting your router to fix connectivity issues, then a mesh network setup is precisely what you need to achieve truly robust home network optimization.
Choosing the Right Mesh WiFi System for Your Home
With a growing number of mesh WiFi systems on the market, selecting the perfect one for your specific needs can feel daunting. However, by focusing on a few key factors and understanding important features, you can make an informed decision that ensures optimal performance and value for your investment in a mesh network setup.
Factors to Consider: Home Size, Speed, and Budget
Before diving into specific models, assess your home’s unique requirements. Your home’s square footage and layout are critical; larger homes or those with multiple floors will require more satellite nodes than smaller, single-story apartments. Consider your current internet speed plan; if you have a gigabit connection, you’ll want a mesh system capable of delivering those speeds across your network.
Finally, set a realistic budget. Mesh systems range widely in price, with basic two-node setups starting around $150-200 and high-end, multi-node, feature-rich systems reaching $500 or more. Balance your needs with what you’re willing to spend, remembering that a good system is an investment in your daily connectivity.
Key Features to Look For: WiFi 6/6E, Tri-Band, Ethernet Ports
When comparing systems, several technical specifications will dictate performance. Look for systems that support WiFi 6 (802.11ax) or the newer WiFi 6E. WiFi 6 offers faster speeds, better efficiency for multiple devices, and improved performance in congested network environments. WiFi 6E takes it a step further by adding support for the 6GHz band, which is less congested and offers even higher speeds, especially beneficial for wireless backhaul. A tri-band mesh system is also highly recommended.
These systems dedicate one of their three WiFi bands (usually a 5GHz band) exclusively for communication between the primary router and its satellite nodes, preventing slowdowns that can occur when client devices share the backhaul band. Lastly, check for sufficient Ethernet ports on both the primary and satellite nodes, as these are invaluable for connecting wired devices like gaming consoles, smart TVs, or network-attached storage (NAS) directly, which can improve internet speed and reduce wireless congestion.
Popular Mesh WiFi Brands and Systems Overview
The mesh WiFi market is dominated by several reputable brands, each offering a range of systems to suit different needs and budgets. Understanding the landscape can help you choose. Some of the most popular and highly-regarded brands include:
- Netgear Orbi: Known for its powerful performance, especially with tri-band mesh systems, and dedicated wireless backhaul.
- Eero (Amazon): Valued for its simplicity, ease of setup, and robust network security features, often providing excellent whole-home coverage.
- Google Nest WiFi: Integrates seamlessly with Google Assistant and offers a sleek design, focusing on user-friendliness.
- TP-Link Deco: Offers a wide range of options, from budget-friendly to high-performance WiFi 6 systems, known for their reliability.
- Linksys Velop: Provides a variety of tri-band and WiFi 6 options, often praised for flexible placement and strong performance.
Researching reviews and comparing specific models within these brands based on your home size, internet speed, and budget will help you pinpoint the ideal mesh system for your requirements.
Pre-Setup Checklist: Preparing for a Smooth Installation
A little preparation goes a long way in ensuring a seamless and frustration-free mesh network setup. Before you unbox your new system, taking a few minutes to gather information and optimize your environment will save you time and potential headaches, making the process of how to set up mesh WiFi much simpler.
Gathering Your Tools and Information
Having everything at hand before you begin is crucial. You’ll need your new mesh WiFi system (primary router and all satellite nodes), the power adapters for each device, and an Ethernet cable (usually included). Additionally, gather your internet service provider (ISP) account information, including any login credentials for your modem or existing router if you plan to use it in bridge mode.
It’s also wise to have your current WiFi network name (SSID) and password, as some mesh systems can adopt these settings for a smoother transition. A smartphone or tablet will be essential, as most mesh systems are configured via a dedicated mobile app.
Optimizing Your Existing Network Environment
To prevent conflicts and ensure the best performance from your new mesh system, it’s often necessary to make a few adjustments to your existing network. If you plan to replace your ISP-provided router entirely, you’ll simply disconnect it. However, if your ISP modem is also a router (a gateway device), you might need to put it into ‘bridge mode’ or ‘modem-only mode.’ This prevents double NAT issues and allows your new mesh system to manage all routing functions.
Consult your ISP’s documentation or support for instructions on how to do this. Disabling the WiFi on your old router is also a good practice to avoid interference once your mesh network is active. This ensures your new mesh system is the sole source of your home’s wireless connectivity, preventing potential issues when setting up mesh WiFi.
Best Practices for Router Placement and Power
Strategic router placement is key to maximizing your mesh system’s performance. The primary mesh router (main node) should be connected directly to your modem and placed in a central location in your home, ideally in an open area, away from large metal objects, microwaves, cordless phones, and other potential sources of interference. Avoid placing it inside cabinets or behind TVs.
Ensure all primary and satellite nodes have access to a reliable power outlet. Don’t use surge protectors or power strips with too many devices, as this can sometimes affect performance. Think about where your internet connection enters your home and how you can best position the main router to serve the largest area before needing satellite nodes. Good router placement is foundational to achieving robust whole-home coverage and an excellent internet speed.
Step-by-Step Guide to Setting Up Your Mesh WiFi System
Now that you’ve prepared your environment, it’s time for the exciting part: bringing your mesh WiFi system to life! While specific steps may vary slightly between brands, the general process of how to set up mesh WiFi remains consistent, focusing on establishing the primary node first, then integrating the satellite nodes.
Connecting the Main Mesh Router (Primary Node)
- Power Down: Unplug your existing modem from its power source and wait about 30 seconds.
- Connect Ethernet: Connect one end of the included Ethernet cable to the WAN (or Internet) port on your main mesh router. Connect the other end to the Ethernet port on your modem.
- Power On Modem: Plug your modem back into its power source and wait for it to fully boot up and establish an internet connection (this might take a few minutes, indicated by solid lights).
- Power On Primary Router: Plug your main mesh router into a power outlet and wait for its indicator light to show it’s ready (consult your system’s manual for specific light patterns).
- Launch App: On your smartphone or tablet, download and open the mesh system’s dedicated app (e.g., Netgear Orbi, Eero, Google Home). Follow the on-screen prompts to create an account and begin the setup process for your primary node. This typically involves scanning a QR code or selecting your device from a list.
During this initial setup, you’ll usually be prompted to create a new network name (SSID) and password for your mesh network. You can often choose to use your old WiFi credentials to simplify the transition for your existing devices, or create entirely new ones for improved network security.
Adding Satellite Nodes and Optimizing Placement
Once your primary node is online and broadcasting WiFi, it’s time to integrate your satellite nodes to achieve whole-home coverage. This is where strategic router placement for your satellite nodes becomes critical to eliminate WiFi dead zones.
- Initial Placement: Place your first satellite node about halfway between your primary router and the area where you typically experience weak WiFi. Ensure it’s within range of the primary node’s signal.
- Power On: Plug the satellite node into a power outlet.
- Add via App: Follow the instructions in your mesh system’s app to add the new satellite node. The app will guide you through the pairing process, which often involves the node’s indicator light changing color to confirm a successful connection and good signal strength.
- Repeat for Additional Nodes: Continue this process for any additional satellite nodes, placing them strategically to extend coverage without losing connection to the previous node or the primary router.
- Test Coverage: After all nodes are connected, walk around your home with your smartphone or laptop, checking signal strength in different areas. Most mesh apps have a built-in signal strength tester or a network map that shows how well your nodes are communicating. Adjust placement if necessary to ensure robust whole-home coverage.
Remember, satellite nodes work best when they can “see” another node, either the primary or another satellite, with a strong signal. Avoid placing them too far apart, as this diminishes their effectiveness and can lead to a weaker wireless backhaul.
Configuring Your Mesh Network via the App/Web Interface
With all your hardware connected, the final step in how to set up mesh WiFi is to fine-tune your network using the mobile app or a web browser interface. This is where you can truly take control of your home network optimization.
- Network Name & Password: Confirm your WiFi network name (SSID) and password.
- Guest Network: Set up a separate guest network with its own password for visitors, keeping your main network secure.
- Parental Controls: Configure parental controls to manage internet access for specific devices or users.
- Device Prioritization (QoS): Prioritize certain devices or applications (e.g., streaming, gaming) to ensure they always get the necessary internet speed.
- Firmware Updates: Check for and install any available firmware updates to ensure optimal performance and network security.
- Network Map: Familiarize yourself with the network map feature, which visually displays your primary router, satellite nodes, and connected devices, helping you identify any areas needing attention.
Take the time to explore all the settings your mesh system offers, as many provide advanced features for a truly customized and secure home network.
Optimizing and Troubleshooting Your Mesh WiFi Network
Setting up your mesh WiFi system is a great first step, but ongoing optimization and knowing how to troubleshoot common issues are crucial for maintaining peak performance and ensuring seamless whole-home coverage. This proactive approach ensures your internet speed remains consistently high.
Advanced Settings for Performance: QoS, Guest Networks
Most modern mesh systems offer a suite of advanced settings accessible through their mobile app or web interface, allowing for significant home network optimization. One of the most impactful is Quality of Service (QoS). QoS allows you to prioritize certain types of traffic or specific devices. For example, you can give priority to your streaming devices for 4K video, your gaming console for low-latency online play, or your work laptop for video conferencing.
This ensures that even when your network is busy, critical applications perform without lag. Setting up a dedicated guest network is also a smart move for network security. This isolates visitors’ devices from your main network, protecting your personal data and smart home devices while still providing internet access. Many systems also offer features like beamforming (directing signals to devices) and MU-MIMO (serving multiple devices simultaneously), which work automatically to enhance performance.
Testing Your Mesh Network’s Coverage and Speed
After initial setup and placement of your primary router and satellite nodes, it’s vital to systematically test your network’s coverage and internet speed. Walk through every room of your home, including basements, attics, and outdoor areas where you expect coverage. Use a reliable speed test app or website (e.g., Speedtest.net, Fast.com) on your smartphone or laptop in various locations. Pay attention to areas where the speed drops significantly or where your device struggles to maintain a connection.
Your mesh system’s app often includes a network map or signal strength indicator that can help visualize coverage and identify weak spots. If you find consistent WiFi dead zones, you might need to adjust the router placement of an existing satellite node or consider adding another one to fill the gap. Remember, the goal is consistent whole-home coverage, not just high speeds near the main router.
Common Troubleshooting Tips for Connectivity Issues
Even with the best setup, occasional connectivity issues can arise. Knowing a few common troubleshooting steps can save you a call to tech support. If a specific device isn’t connecting, try restarting that device first. If an entire section of your home loses WiFi, check the indicator lights on the nearest satellite node to ensure it’s powered on and connected to the mesh network.
Often, simply power cycling (unplugging for 30 seconds, then replugging) the affected node or even the entire mesh system (starting with the modem, then primary router, then satellites) can resolve temporary glitches. Check your mesh app for any error messages or alerts. Ensure your firmware is up-to-date, as outdated software can sometimes cause instability. If you’re experiencing slow internet speed, ensure no single device is hogging bandwidth and check your ISP’s status for outages. Persistent issues might require consulting your system’s support documentation or contacting their customer service.
Maintaining Your Mesh WiFi System for Long-Term Performance
A mesh WiFi system, like any sophisticated piece of technology, benefits from regular maintenance to ensure it continues to provide seamless coverage and optimal internet speed for years to come. Proactive steps contribute significantly to the longevity and network security of your home network.
Keeping Firmware Updated: Security and Performance
One of the most critical aspects of maintaining your mesh WiFi system is regularly updating its firmware. Firmware is the operating software embedded in your primary router and satellite nodes. Manufacturers frequently release updates that include security patches, bug fixes, performance improvements, and sometimes even new features. Outdated firmware can leave your network vulnerable to security threats and may also lead to instability or slower performance.
Most modern mesh systems allow you to enable automatic firmware updates via their mobile app, which is highly recommended. If automatic updates aren’t available or enabled, make it a habit to check for new firmware versions monthly through the app or the system’s web interface. This simple step is vital for robust network security and ensuring your mesh network operates at its best.
Monitoring Network Health and Connected Devices
Your mesh system’s mobile app is a powerful tool for ongoing network management. Regularly check the app for a quick overview of your network’s health. Most apps provide a network map that shows the connection status and signal strength of your primary router and all satellite nodes. You can also view a list of all connected devices.
This allows you to identify any unfamiliar devices that might be connected (a potential security risk), monitor bandwidth usage, and identify devices that might be causing congestion. Being aware of your connected devices helps you maintain control over your home network and ensures that your internet speed isn’t being unexpectedly consumed. Some systems even offer tools to run diagnostic tests or optimize channel selection for better performance.
Future-Proofing Your Home Network
Investing in a mesh WiFi system is a step towards future-proofing your home network, but technology evolves rapidly. As new standards like WiFi 7 emerge and your household’s demands for internet speed and connectivity grow, you may eventually consider upgrades. Look for modular systems and allow you to easily add more satellite nodes as your needs change or your home expands.
Consider systems with WiFi 6 or WiFi 6E capabilities now, as these standards offer significant improvements and are becoming increasingly common in new devices. Maintaining good network security practices, such as strong, unique passwords and enabling WPA3 encryption if available, is also crucial for long-term protection. By staying informed and utilizing the features of your mesh system, you can ensure your home network remains fast, secure, and reliable for years to come, consistently delivering excellent whole-home coverage.
Frequently Asked Questions
Is mesh WiFi better than an extender?
Yes, mesh WiFi is generally far superior to a traditional WiFi extender. While extenders simply repeat a weakened signal, often creating a separate network and causing handoff issues, mesh systems create a single, unified network with multiple access points (nodes). Your devices seamlessly switch between nodes, providing consistent internet speed and eliminating WiFi dead zones for true whole-home coverage without performance degradation.
Where should I place my mesh WiFi nodes?
The primary mesh router should be connected to your modem and placed in a central, open location in your home. Satellite nodes should be placed roughly halfway between the primary router and the areas needing coverage, ensuring each node has a strong signal from another node. Avoid placing them behind large obstructions, in cabinets, or near interference sources like microwaves. The goal is to create overlapping coverage zones for seamless roaming.
Do I need to turn off my old router for mesh WiFi?
Yes, in most cases, you should either turn off your old router’s WiFi or put your ISP-provided gateway device into ‘bridge mode’ (modem-only mode). Running two routers simultaneously can create network conflicts, double NAT issues, and interfere with your mesh system’s performance. The mesh system is designed to be your primary router, managing all network traffic and WiFi broadcasting for optimal home network optimization.
How many mesh WiFi nodes do I need?
The number of mesh WiFi nodes you need depends on your home’s size, layout, and construction materials. A good starting point is often a 2-pack for smaller to medium-sized homes (1,500-3,000 sq ft) and a 3-pack or more for larger homes (3,000+ sq ft), multi-story residences, or those with thick walls. Your mesh system’s app will often provide guidance on optimal placement and indicate if additional nodes are needed to eliminate WiFi dead zones.
Can mesh WiFi replace my existing router?
Yes, a mesh WiFi system is designed to replace your existing router entirely. The main mesh unit acts as your primary router, connecting directly to your modem. The satellite nodes then extend this network, creating a unified, powerful WiFi network throughout your home. You will no longer need your old router for WiFi functionality, though you might keep an ISP-provided gateway in modem-only mode.
What is the best mesh WiFi system for a large house?
For a large house, look for mesh WiFi systems that offer strong coverage, multi-pack options (3 or more nodes), and advanced features. Systems with WiFi 6 or WiFi 6E support, tri-band mesh for dedicated wireless backhaul, and robust processing power are ideal.
Popular choices often include Netgear Orbi (especially the higher-end models), TP-Link Deco, and Linksys Velop, specifically those offering kits designed for larger square footage and high internet speed demands. Always check reviews and specifications against your home’s specific size and layout.
Conclusion
Setting up a mesh WiFi system is one of the most effective ways to banish WiFi dead zones and achieve truly seamless, high-performance whole-home coverage. By understanding the technology, choosing the right system, and following our detailed step-by-step guide on how to set up mesh WiFi, you can transform your home networking experience.
Remember to optimize your router placement, leverage advanced settings, and maintain your system with regular firmware updates for long-term reliability and network security. Embrace the future of home internet and enjoy uninterrupted connectivity in every corner of your digital life. Are you ready to upgrade your home network? Share your mesh WiFi setup experiences in the comments below!